Documentation
Exporting your design
Export to library
In a nutshell, the graph part of your design can be exported in two fundamental ways - either added to library as a component, or exported as source code. There are quite a few options, so it’s worth reading this, but the GUI should be reasonably easy to understand too.
Before starting, it is a good idea to save a copy of your design.
Also, consider naming your components that are on the edge of the design (e.g. interacting with the bench). This will make it much easier to identify ports in the export dialog.
To initiate the process, hit the Export… button. This brings up the export wizard.
Export configuration is saved in your Spektar home .cache directory so next time you run export all your settings will be saved.
Step 1 - Export options
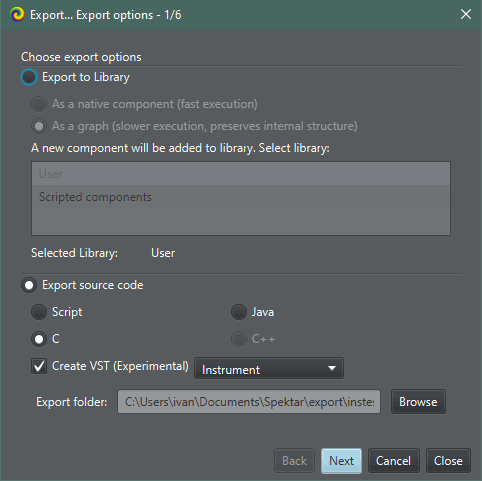
Note the target folder at the bottom - this will be automatically set based on your project name.
Export to library
Select this option to create a new library component from your design. You should almost always use “As a native component” here unless you really want to preserve internal structure at the cost of slower execution.
Adding a design to library means we can reuse whole design and treat it as a component. There are two ways to go about this:
- Exporting as a native component - this means that components that constitute the graph are combined in a single source file and compiled. This produces highly efficient code and the component may operate many times faster than it did as a graph.
- Exporting as a graph - this option preserves internal structure of the graph within the component.
Finally, library selector allows selecting which library the new component should be added to. Note that only “User” library is presently supported.
Exporting as source
Select the target programming language. If C programming language is selected, you can also choose to create a VST plugin from the design. Vst plugins can be either instruments (e.g. a synthesizer) or effects (e.g. reverb), so please choose the plugin type here.
Step 2 - Design check
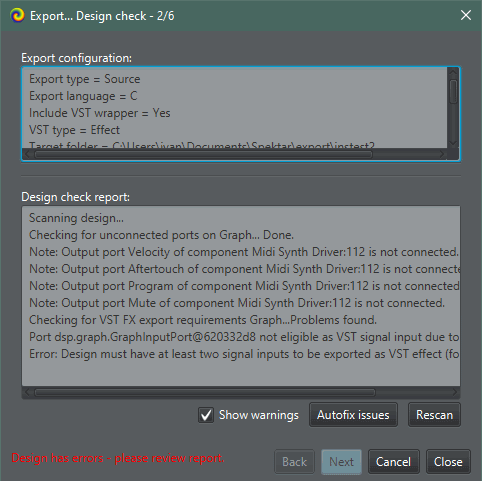
This is a new feature that can check the design and point to errors that can affect export to chosen target. Export configuration is safe to ignore.
Some issues can be automatically fixed - e.g. unconnected inputs can be set to zero, so Autofix button can handle that for you.
There are however errors that can’t be automatically fixed - for example, a VST instrument must have one MIDI in and two signal outputs so if these are not present and you request VSTI export, you’ll have to close export dialog and fix the design.
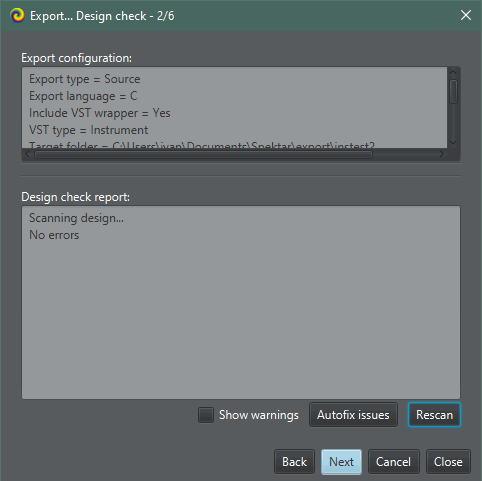
Warnings are usually safe to ignore so you can uncheck this if there is a lot of content in the Design Check Report. When all is fixed up, the dialog should look like below, and you can hit the Next button.
Step 3 - Define component metadata and IO
Follow these steps to set up your component for export:
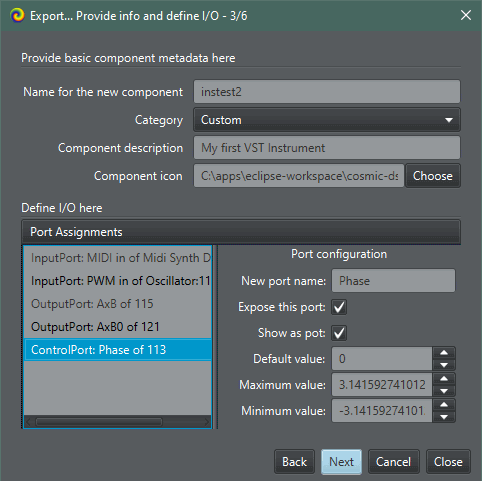
- Add component name. This will be shown in library as the component name.
- Choose a category. This only applies if adding to library (e.g. not for generating source code)
- Add component description. This is freeform, but keep it short!
- Select icon. PNG is preferred, GIF and JPG tolerated. This is entirely optional - default icon will be provided if one is not specified.
- Now the interesting part - defining ports.
- General rules for exporting ports
- Input ports connected to bench components will always be exported.
- Control ports connected to a bench component can be exported as input or shown as potentiometer on the new component.
- Output ports are up to you - can be exported or not.
- Configuring Input ports
- Select the port from the list on the right
- Choose a name for this port on your component
- Configuring Output ports
- Select the port from the list on the right
- Choose a name for this port on your component
- Tick or untick the “Expose this port” checkbox as desired
- Configuring Control ports
- Select the port from the list on the right
- Choose a name for this port on your component
- Tick or untick the “Show as pot” checkbox as desired
- General rules for exporting ports
- Review port assignments. Double check…
- Hit the “Next” button!
Step 4 - Review component
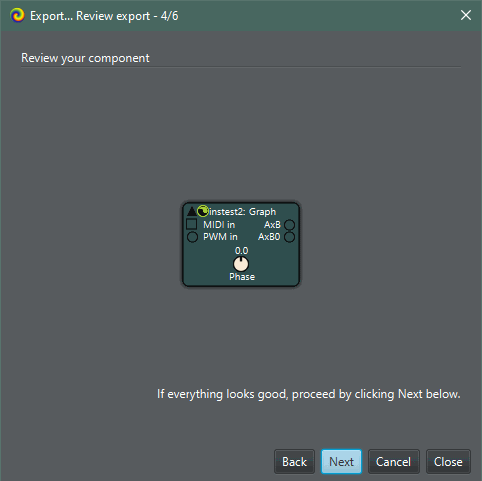
Double check port names and whether control port defaults are set correctly.
Step 5 - Plugin metadata (VST only!)
This screen allows you to set VST plugin metadata.
Always hit “Generate UUIDs” the first time you export. Otherwise your plugin UUIDs may clash with other plugins when deployed to a VST host.
There may be some restrictions on the content of particular fields which are not enforced in this dialog. Ultimately, we are generating source code so be sensible! For example, namespace should be alphanumeric only.
Provided default values should present a good indication of what you can do there, and most importantly, you can leave all this alone (apart from default UUIDs) and your VST plugin will work just fine.
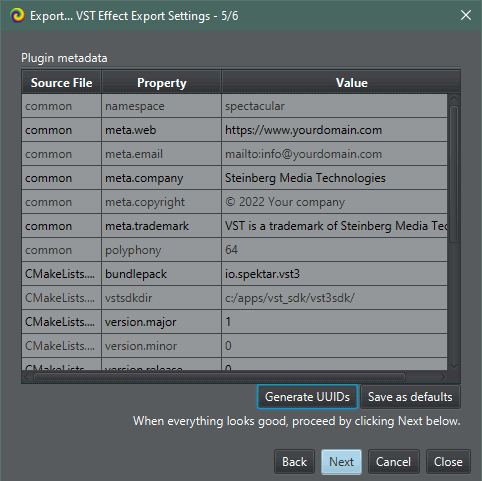
Poliphony is another example - this has to be an integer number. Most plugins have polyphony between 8 and 16 so that’s a safe bet to avoid overusing CPU.
Once you have edited the fields, you can save these settings as workspace defaults so you don’t have to make changes for every project.
Step 6 - Export
Review summary and hit Export button. Results can be seen in the Export log box.
Once done, the Library pane will refresh and export wizard can be closed.
You are pretty much ready to go now. You can review library components or get a bit of background information on scripting.